
Gold Coin
Animal Skin
Arrow
Poison Arrow
Fire Arrow
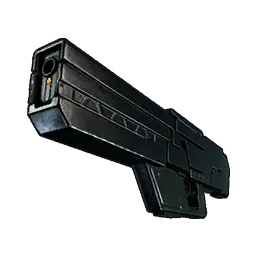
Assault Rifle
Stone Axe
Metal Axe
Refined Metal Axe
Axe4
Wooden Club
Bat
Meat Cleaver
Stun Baton

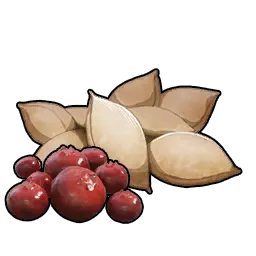
Red Berries
Baked Berries
Crossbow

Charcoal

Claw

Cloth
High Quality Cloth
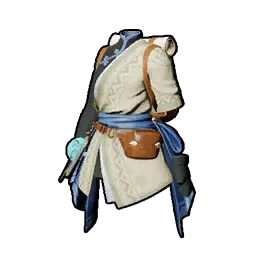
Cloth Outfit
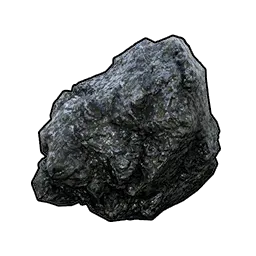
Coal
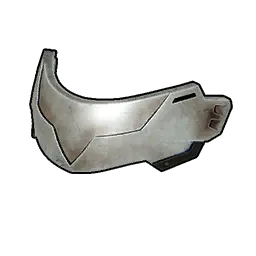
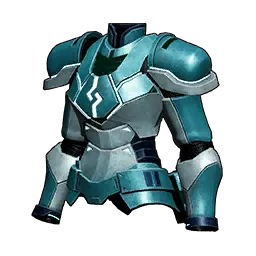
Metal Armor
Metal Helm

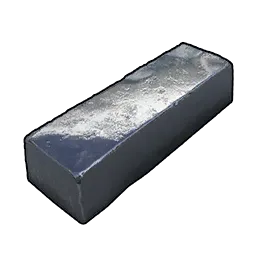
Ingot
Ore

Double-barreled Shotgun
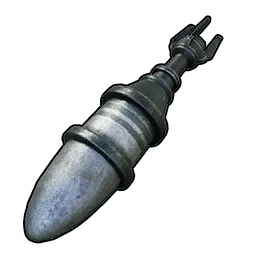
Rocket Ammo
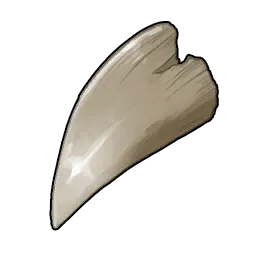
Fang
Fiber
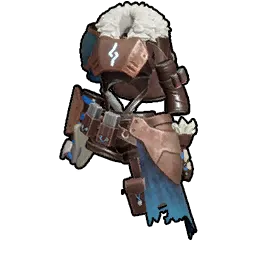
Pelt Armor

Feathered Hair Band
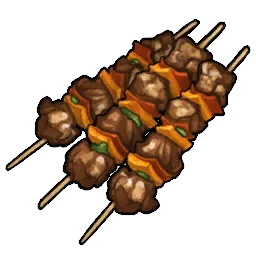
Grilled Meat

Gunpowder
Gunpowder
Handgun

Decal Gun 1
Decal Gun 2
Decal Gun 3
Decal Gun 4
Decal Gun 5

Low Grade Medical Supplies

Medical Supplies
High Grade Medical Supplies

Mind Control Meds

Beautiful Flower

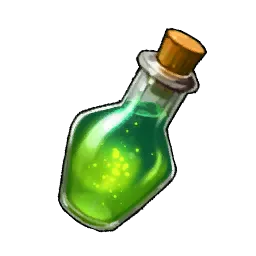
Suspicious Juice

Strange Juice
Memory Wiping Medicine

Homing Sphere Launcher
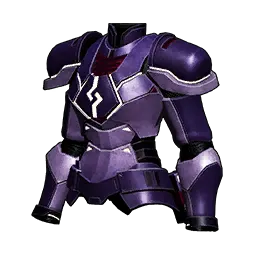
Refined Metal Armor
Refined Metal Helm
Refined Ingot

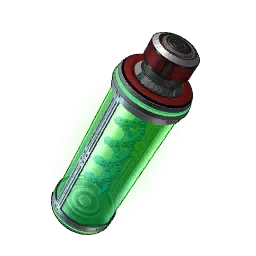
Energy Cartridge
Laser Rifle

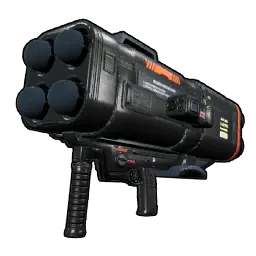
Rocket Launcher

Leather

Nail

Circuit Board

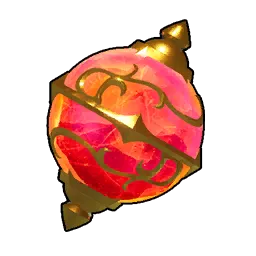
Pal Sphere

Mega Sphere

Giga Sphere
Hyper Sphere

Ultra Sphere

Legendary Sphere

Radar Sphere

Bread
Stone Pickaxe
Metal Pickaxe
Refined Metal Pickaxe
Pump-action Shotgun
Single-shot Rifle

Decal Ink

Handgun Ammo
Rifle Ammo
Shotgun Shells
Coarse Ammo
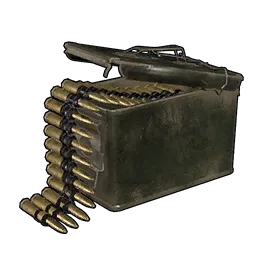
Machine Gun Ammo
Assault Rifle Ammo
Magnum Ammo
Scatter Sphere Launcher

Single-shot Sphere Launcher

Pal Metal Armor

Pal Metal Helm

Pal Metal Ingot
Stone

Paldium Fragment

Paldium Clump
Dung
Huge Dung Pile
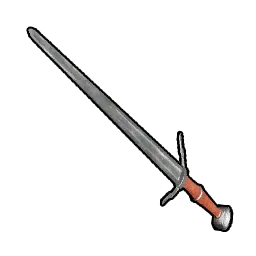
Sword

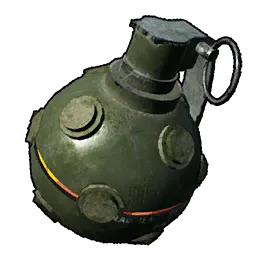
Frag Grenade

Incendiary Grenade
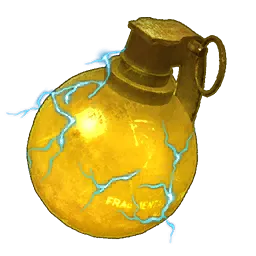
Shock Grenade
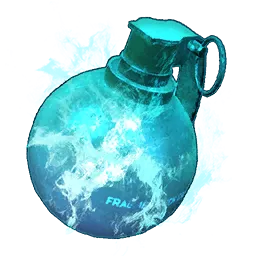
Ice Grenade

Tomato

Old Bow

Poison Bow

Fire Bow

Poison Arrow Crossbow

Fire Arrow Crossbow

Three Shot Bow
Five Shot Bow
Berry Seeds
PotatoSeedPotatoes

Tomato Seeds
Lettuce Seeds

Wheat Seeds

Wheat
Flour
Wood
Wool
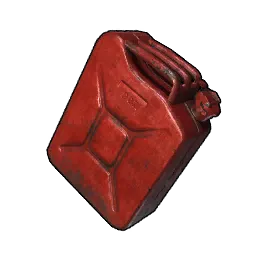
Crude Oil

Plasteel
Computer

Lettuce

Grape

Hop

Egg

Milk

Hot Milk
Jam-filled Bun
Potage

Salad

Omelet

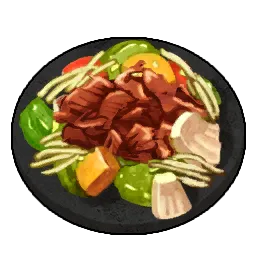
Stir-fried Veggies

Hot Dog

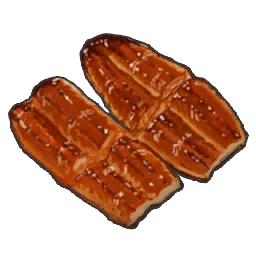
Pancake
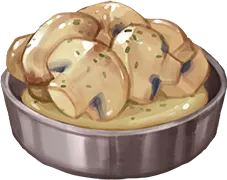
Marinated Mushrooms

Mushroom Soup
Curry

Carbonara

Burrito

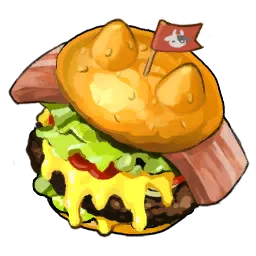
Cheeseburger

Pizza

Bolognese Sauce

Cake

Mushroom Stew

Sandwich

Corn Soup

Stew

Hamburger
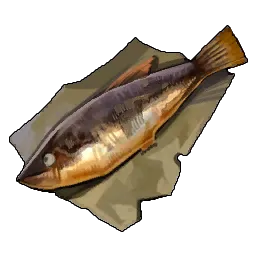
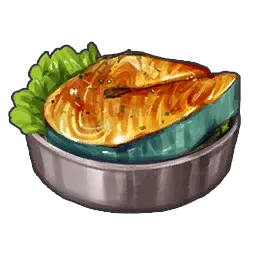
Grilled Fish
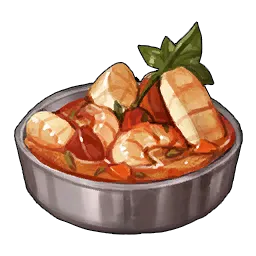
Seafood Soup

Fried Egg

LuxuryOmelette

Beer

Wine
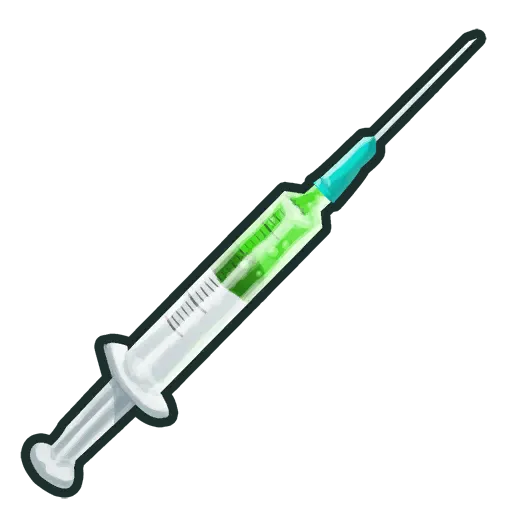
Antibiotic_Normal
Antibiotic_Good
Antibiotic_Super

Fishing Rod_Old
Fishing Rod_Good
Fishing Rod_Super
Fishing Rod_Legendary
Hand-held Torch
Normal Parachute
Mega Glider
Giga Glider

Hyper Glider
Lightz Helmet

Gas Mask
Night Vision Goggles
Lifmunk Effigy

Ruby

Sapphire

Emerald
Diamond
High Grade Technical Manual
Innovative Technical Manual

Future Technical Manual

Ancient Technical Manual
Lifmunk's Submachine Gun

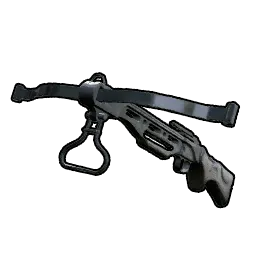
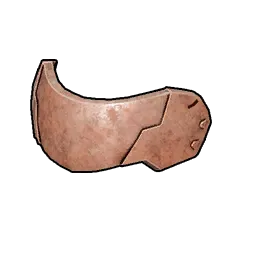
Direhowl's Saddled Harness

Common Egg
Common Egg
Large Common Egg
Large Common Egg
Huge Common Egg

Scorching Egg
Scorching Egg
Large Scorching Egg
Large Scorching Egg
Huge Scorching Egg

Damp Egg
Damp Egg
Large Damp Egg
Large Damp Egg
Huge Damp Egg

Verdant Egg
Verdant Egg
Large Verdant Egg
Large Verdant Egg
Huge Verdant Egg

Electric Egg
Electric Egg
Large Electric Egg
Large Electric Egg
Huge Electric Egg

Frozen Egg
Frozen Egg
Large Frozen Egg
Large Frozen Egg
Huge Frozen Egg
Rocky Egg
Rocky Egg
Large Rocky Egg
Large Rocky Egg
Huge Rocky Egg
Dark Egg
Dark Egg
Large Dark Egg
Large Dark Egg
Huge Dark Egg
Dragon Egg
Dragon Egg
Large Dragon Egg
Large Dragon Egg
Huge Dragon Egg

Common Shield

Mega Shield

Giga Shield

Hyper Shield
Repair Kit
Ancient Civilization Parts
Jormuntide Ignis Saddle
Eikthyrdeer Terra Saddle
Jolthog Cryst's Gloves
Dinossom Lux Saddle
Mammorest Cryst Saddle
Relaxaurus Lux's Missile Launcher
Pyrin Noct Saddle
Broncherry Aqua Saddle
Elphidran Aqua Saddle
Blazehowl Noct Saddle
Suzaku Aqua Saddle
Surfent Terra Saddle
Reptyro Cryst Saddle
Frostallion Noct Saddle
Mossanda Lux's Grenade Launcher
Wumpo Botan Saddle
Kingpaca Cryst Saddle
Vanwyrm Cryst Saddle
Hangyu Cryst's Glove
Jormuntide Saddle
Eikthyrdeer Saddle
Jolthog's Gloves

Foxparks's Harness
Rushoar Saddle
Tanzee's Assault Rifle

Pengullet's Rocket Launcher
Melpaca Saddle
Dinossom Saddle
Mammorest Saddle
Univolt Saddle
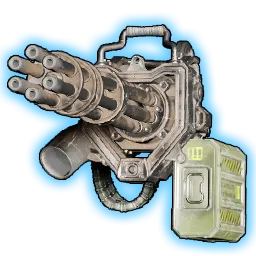
Grizzbolt's Minigun
Relaxaurus's Missile Launcher
Pyrin Saddle
Broncherry Saddle
Arsox Saddle
Azurobe Saddle
Elphidran Saddle
Fenglope Saddle
Tocotoco's Gloves
Galeclaw's Gloves
Killamari's Gloves
Celaray's Gloves
Maraith Saddle

Flopie's Necklace
Blazehowl Saddle
Suzaku Saddle
Surfent Saddle
Dazzi's Necklace
Reptyro Saddle
Kitsun Saddle
Daedream's Necklace

Dragostrophe's Shotgun
Frostallion Saddle
Faleris Saddle
Blazamut Saddle
Reindrix Saddle
Shadowbeak Saddle
Boltmane Saddle
Yakumo Saddle
Astegon Saddle
Quivern Saddle
Rayhound Saddle
Mossanda's Grenade Launcher
Wumpo Saddle
Nitewing Saddle
Jetragon's Missile Launcher
Helzephyr Saddle
Kingpaca Saddle
Paladius Saddle
TBD
Dark Mutant's Power Converter
Beakon Saddle
Ragnahawk Saddle
Necromus Saddle
Sweepa Saddle
TBD
Golden Horse Saddle
TBD
Bad Catgirl's Shotgun
Grintale Saddle
Dazemu Saddle

Digtoise's Headband
Vanwyrm Saddle
Chillet Saddle
Hangyu's Gloves
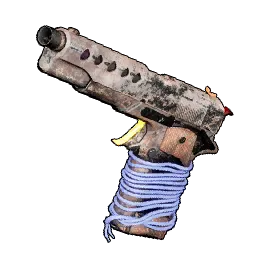
Makeshift Handgun

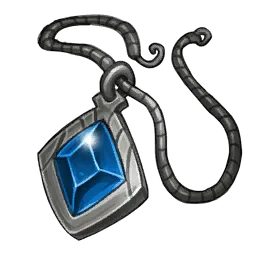
Life Pendant
Life Pendant +1
Life Pendant +2

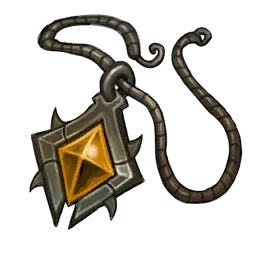
Attack Pendant
Attack Pendant +1
Attack Pendant +2
Defense Pendant
Defense Pendant +1
Defense Pendant +2
Pendant of Diligence
Pendant of Diligence +1
Pendant of Diligence +2
Heat Resistant Undershirt
Heat Resistant Undershirt +1
Heat Resistant Undershirt +2
Thermal Undershirt
Thermal Undershirt +1
Thermal Undershirt +2

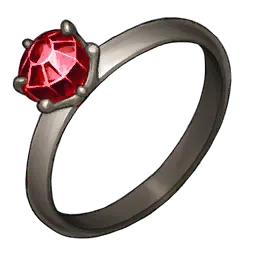
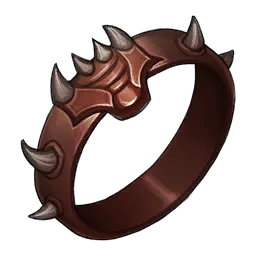
Ring of Resistance
Ring of Resistance +1
Ring of Resistance +2
Ring of Flame Resistance
Ring of Flame Resistance +1
Ring of Flame Resistance +2

Ring of Water Resistance
Ring of Water Resistance +1
Ring of Water Resistance +2

Ring of Lightning Resistance
Ring of Lightning Resistance +1
Ring of Lightning Resistance +2

Ring of Grass Resistance
Ring of Grass Resistance +1
Ring of Grass Resistance +2

Ring of Ice Resistance
Ring of Ice Resistance +1
Ring of Ice Resistance +2

Ring of Earth Resistance
Ring of Earth Resistance +1
Ring of Earth Resistance +2
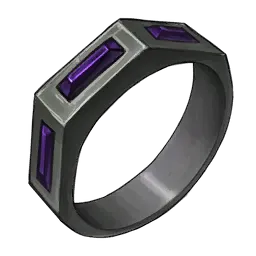
Ring of Dark Resistance
Ring of Dark Resistance +1
Ring of Dark Resistance +2
Ring of Dragon Resistance
Ring of Dragon Resistance +1
Ring of Dragon Resistance +2

Small Pal Soul

Medium Pal Soul

Large Pal Soul

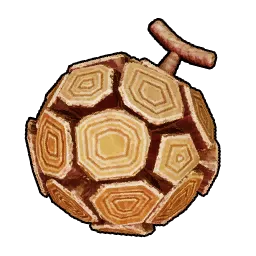
Mushroom

Baked Mushroom

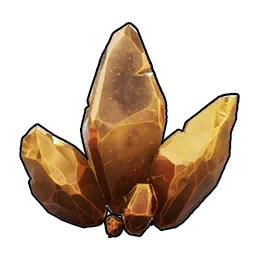
Sulfur

Honey

Cotton Candy
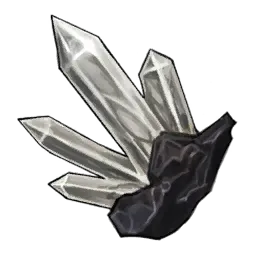
Pure Quartz

High Quality Pal Oil

Polymer
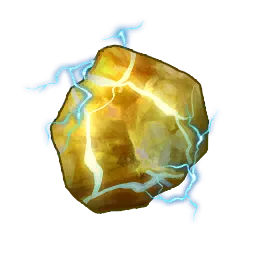
Electric Organ

Venom Gland

Flame Organ

Ice Organ

Bone

Silicon

Cement

Carbon Fiber

Horn

Pal Fluids

Tocotoco Feather

Gumoss Leaf

Penking Plume

Katress Hair

Skill Fruit: Power Shot
Skill Fruit: Power Bomb
Skill Fruit: Pal Blast
Skill Fruit: Air Cannon
Skill Fruit: Implode

Grass Skill Fruit: Wind Cutter
Grass Skill Fruit: Grass Tornado
Grass Skill Fruit: Solar Blast
Grass Skill Fruit: Seed Machine Gun
Grass Skill Fruit: Spine Vine
Grass Skill Fruit: Seed Mine

Water Skill Fruit: Aqua Gun
Water Skill Fruit: Aqua Burst
Water Skill Fruit: Hydro Laser
Water Skill Fruit: Hydro Jet
Water Skill Fruit: Bubble Blast
Water Skill Fruit: Acid Rain

Fire Skill Fruit: Ignis Blast
Fire Skill Fruit: Ignis Breath
Fire Skill Fruit: Fire Ball
Fire Skill Fruit: Flare Arrow
Fire Skill Fruit: Spirit Fire
Fire Skill Fruit: Ignis Rage
Fire Skill Fruit: Flare Storm

Electric Skill Fruit: Shockwave
Electric Skill Fruit: Lightning Bolt
Electric Skill Fruit: Lightning Streak
Electric Skill Fruit: Plasma Tornado
Electric Skill Fruit: Spark Blast
Electric Skill Fruit: Lock-on Laser
Electric Skill Fruit: Electric Ball
Electric Skill Fruit: Tri-Lightning
Electric Skill Fruit: Lightning Strike
Earth Skill Fruit: Stone Cannon
Earth Skill Fruit: Sand Tornado
Earth Skill Fruit: Rock Lance
Earth Skill Fruit: Sand Blast
Earth Skill Fruit: Stone Blast

Ice Skill Fruit: Ice Missile
Ice Skill Fruit: Iceberg
Ice Skill Fruit: Blizzard Spike
Ice Skill Fruit: Icicle Cutter
Ice Skill Fruit: Cryst Breath

Dark Skill Fruit: Shadow Burst
Dark Skill Fruit: Nightmare Ball
Dark Skill Fruit: Psycho Gravity
Dark Skill Fruit: Poison Blast
Dark Skill Fruit: Spirit Flame
Dark Skill Fruit: Dark Laser

Dragon Skill Fruit: Draconic Breath
Dragon Skill Fruit: Dragon Cannon
Dragon Skill Fruit: Dragon Burst
Dragon Skill Fruit: Dragon Meteor

Precious Dragon Stone

Precious Plume

Precious Entrails
Precious Claw
Precious Pelt

Stone Spear
Metal Spear
Refined Metal Spear
Elizabee's Staff
Beegarde's Spear
Lily's Spear
Hip Lantern

Small Feed Bag

Average Feed Bag

Large Feed Bag

Huge Feed Bag

Giant Feed Bag
Grappling Gun +0
Mega Grappling Gun +1
Giga Grappling Gun +2
Hyper Grappling Gun +3

Monarch's Crown
Monarch's Crown +1
Monarch's Crown +2
Monarch's Crown +3
Monarch's Crown +4

Golden Crown
Golden Crown +1
Golden Crown +2
Golden Crown +3
Golden Crown +4

Long-eared Headband
Long-eared Headband +1
Long-eared Headband +2
Long-eared Headband +3
Long-eared Headband +4

Witch Hat
Witch Hat +1
Witch Hat +2
Witch Hat +3
Witch Hat +4

Soft Hat
Soft Hat +1
Soft Hat +2
Soft Hat +3
Soft Hat +4

Helmet
Helmet +1
Helmet +2
Helmet +3
Helmet +4

Silk Hat
Silk Hat +1
Silk Hat +2
Silk Hat +3
Silk Hat +4

Tricorne
Tricorne +1
Tricorne +2
Tricorne +3
Tricorne +4
Explorer Cap
Explorer Cap +1
Explorer Cap +2
Explorer Cap +3
Explorer Cap +4

Graduation cap
Graduation cap +1
Graduation cap +2
Graduation cap +3
Graduation cap +4
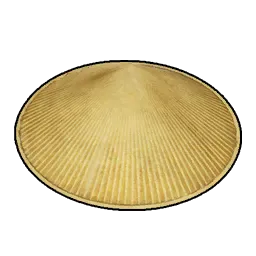
Farming Hat
Farming Hat +1
Farming Hat +2
Farming Hat +3
Farming Hat +4

Bowler Hat
Bowler Hat +1
Bowler Hat +2
Bowler Hat +3
Bowler Hat +4

Tocotoco Cap
Tocotoco Cap +1
Tocotoco Cap +2
Tocotoco Cap +3
Tocotoco Cap +4

Grinning Tocotoco Cap
Grinning Tocotoco Cap +1
Grinning Tocotoco Cap +2
Grinning Tocotoco Cap +3
Grinning Tocotoco Cap +4

Gumoss Cap
Gumoss Cap +1
Gumoss Cap +2
Gumoss Cap +3
Gumoss Cap +4

Penking Cap
Penking Cap +1
Penking Cap +2
Penking Cap +3
Penking Cap +4

Katress Cap
Katress Cap +1
Katress Cap +2
Katress Cap +3
Katress Cap +4

Monarch's Crown Schematic 1
Monarch's Crown Schematic 2
Monarch's Crown Schematic 3
Monarch's Crown Schematic 4
Blueprint of the King's Crown 5
Golden Crown Schematic 1
Golden Crown Schematic 2
Golden Crown Schematic 3
Golden Crown Schematic 4
Blueprint for Golden Crown 5
Long-eared Headband Schematic 1
Long-eared Headband Schematic 2
Long-eared Headband Schematic 3
Long-eared Headband Schematic 4
5 Blueprints of Long-eared Headband
Witch Hat Schematic 1
Witch Hat Schematic 2
Witch Hat Schematic 3
Witch Hat Schematic 4
Design of Witch Hat No. 5
Soft Hat Schematic 1
Soft Hat Schematic 2
Soft Hat Schematic 3
Soft Hat Schematic 4
Blueprint of Soft Hat 5
Helmet Schematic 1
Helmet Schematic 2
Helmet Schematic 3
Helmet Schematic 4
Blueprint of Helmet 5
Silk Hat Schematic 1
Silk Hat Schematic 2
Silk Hat Schematic 3
Silk Hat Schematic 4
5 Schematic Diagrams of the Silk Hat
Tricorne Schematic 1
Tricorne Schematic 2
Tricorne Schematic 3
Tricorne Schematic 4
Blueprint of the Tricorn Hat 5
Exploration Cap Schematic 1
Exploration Cap Schematic 2
Exploration Cap Schematic 3
Exploration Cap Schematic 4
Blueprint of Exploration Hat 5
Graduate Cap Schematic 1
Graduate Cap Schematic 2
Graduate Cap Schematic 3
Graduate Cap Schematic 4
Blueprint 5 of University Hat
Farming Hat Schematic 1
Farming Hat Schematic 2
Farming Hat Schematic 3
Farming Hat Schematic 4
5 Diagrams of Agricultural Hat
Bowler Hat Schematic 1
Bowler Hat Schematic 2
Bowler Hat Schematic 3
Bowler Hat Schematic 4
Blueprint of Bowler Hat 5
Tocotoco Cap Schematic 1
Tocotoco Cap Schematic 2
Tocotoco Cap Schematic 3
Tocotoco Cap Schematic 4
Design Plan 5 for the Crutchli Hat
Grinning Tocotoco Cap Schematic 1
Grinning Tocotoco Cap Schematic 2
Grinning Tocotoco Cap Schematic 3
Grinning Tocotoco Cap Schematic 4
Grinning Curly Hat Blueprint 5
Gumoss Cap Schematic 1
Gumoss Cap Schematic 2
Gumoss Cap Schematic 3
Gumoss Cap Schematic 4
5 Blueprints of Naemochi Hat
Penking Cap Schematic 1
Penking Cap Schematic 2
Penking Cap Schematic 3
Penking Cap Schematic 4
Blueprint of Capppen Hat 5
Katress Cap Schematic 1
Katress Cap Schematic 2
Katress Cap Schematic 3
Katress Cap Schematic 4
Design Blueprint of Clemence Hat 5

Copper Key

Silver Key

Gold Key
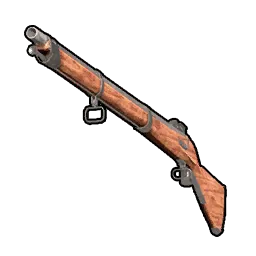
Musket
Old Bow +1
Old Bow +2
Old Bow +3
Old Bow +4
Crossbow +1
Crossbow +2
Crossbow +3
Crossbow +4
Assault Rifle +1
Assault Rifle +2
Assault Rifle +3
Assault Rifle +4
Pump-action Shotgun +1
Pump-action Shotgun +2
Pump-action Shotgun +3
Pump-action Shotgun +4
Handgun +1
Handgun +2
Handgun +3
Handgun +4
Rocket Launcher +1
Rocket Launcher +2
Rocket Launcher +3
Rocket Launcher +4
Musket +1
Musket +2
Musket +3
Musket +4
Double-barreled Shotgun +1
Double-barreled Shotgun +2
Double-barreled Shotgun +3
Double-barreled Shotgun +4
Single-shot Rifle +1
Single-shot Rifle +2
Single-shot Rifle +3
Single-shot Rifle +4
Cloth Outfit +1
Cloth Outfit +2
Cloth Outfit +3
Cloth Outfit +4
Pelt Armor +1
Pelt Armor +2
Pelt Armor +3
Pelt Armor +4
Metal Armor +1
Metal Armor +2
Metal Armor +3
Metal Armor +4
Refined Metal Armor +1
Refined Metal Armor +2
Refined Metal Armor +3
Refined Metal Armor +4
Pal Metal Armor +1
Pal Metal Armor +2
Pal Metal Armor +3
Pal Metal Armor +4
Feathered Hair Band +1
Feathered Hair Band +2
Feathered Hair Band +3
Feathered Hair Band +4
Metal Helm +1
Metal Helm +2
Metal Helm +3
Metal Helm +4
Refined Metal Helm +1
Refined Metal Helm +2
Refined Metal Helm +3
Refined Metal Helm +4
Pal Metal Helm +1
Pal Metal Helm +2
Pal Metal Helm +3
Pal Metal Helm +4
Old Bow Schematic 1
Old Bow Schematic 2
Old Bow Schematic 3
Old Bow Schematic 4
Crossbow Schematic 1
Crossbow Schematic 2
Crossbow Schematic 3
Crossbow Schematic 4
Assault Rifle Schematic 1
Assault Rifle Schematic 2
Assault Rifle Schematic 3
Assault Rifle Schematic 4
Pump-Action Shotgun Schematic 1
Pump-Action Shotgun Schematic 2
Pump-Action Shotgun Schematic 3
Pump-Action Shotgun Schematic 4
Handgun Schematic 1
Handgun Schematic 2
Handgun Schematic 3
Handgun Schematic 4
Rocket Launcher Schematic 1
Rocket Launcher Schematic 2
Rocket Launcher Schematic 3
Rocket Launcher Schematic 4
Musket Schematic 1
Musket Schematic 2
Musket Schematic 3
Musket Schematic 4
Double-barreled Shotgun Schematic 1
Double-barreled Shotgun Schematic 2
Double-barreled Shotgun Schematic 3
Double-barreled Shotgun Schematic 4
Single-shot Rifle Schematic 1
Single-shot Rifle Schematic 2
Single-shot Rifle Schematic 3
Single-shot Rifle Schematic 4
Feathered Hair Band Schematic 1
Feathered Hair Band Schematic 2
Feathered Hair Band Schematic 3
Feathered Hair Band Schematic 4
Metal Helm Schematic 1
Metal Helm Schematic 2
Metal Helm Schematic 3
Metal Helm Schematic 4
Refined Metal Helm Schematic 1
Refined Metal Helm Schematic 2
Refined Metal Helm Schematic 3
Refined Metal Helm Schematic 4
Pal Metal Helm Schematic 1
Pal Metal Helm Schematic 2
Pal Metal Helm Schematic 3
Pal Metal Helm Schematic 4
Cloth Outfit Schematic 1
Cloth Outfit Schematic 2
Cloth Outfit Schematic 3
Cloth Outfit Schematic 4
Pelt Armor Schematic 1
Pelt Armor Schematic 2
Pelt Armor Schematic 3
Pelt Armor Schematic 4
Metal Armor Schematic 1
Metal Armor Schematic 2
Metal Armor Schematic 3
Metal Armor Schematic 4
Refined Metal Armor Schematic 1
Refined Metal Armor Schematic 2
Refined Metal Armor Schematic 3
Refined Metal Armor Schematic 4
Pal Metal Armor Schematic 1
Pal Metal Armor Schematic 2
Pal Metal Armor Schematic 3
Pal Metal Armor Schematic 4
Tropical Outfit Schematic 1
Tropical Outfit Schematic 2
Tropical Outfit Schematic 3
Tropical Outfit Schematic 4
Tundra Outfit Schematic 1
Tundra Outfit Schematic 2
Tundra Outfit Schematic 3
Tundra Outfit Schematic 4
Heat Resistant Pelt Armor Schematic 1
Heat Resistant Pelt Armor Schematic 2
Heat Resistant Pelt Armor Schematic 3
Heat Resistant Pelt Armor Schematic 4
Cold Resistant Pelt Armor Schematic 1
Cold Resistant Pelt Armor Schematic 2
Cold Resistant Pelt Armor Schematic 3
Cold Resistant Pelt Armor Schematic 4
Heat Resistant Metal Armor Schematic 1
Heat Resistant Metal Armor Schematic 2
Heat Resistant Metal Armor Schematic 3
Heat Resistant Metal Armor Schematic 4
Cold Resistant Metal Armor Schematic 1
Cold Resistant Metal Armor Schematic 2
Cold Resistant Metal Armor Schematic 3
Cold Resistant Metal Armor Schematic 4
Heat Resistant Refined Metal Armor Schematic 1
Heat Resistant Refined Metal Armor Schematic 2
Heat Resistant Refined Metal Armor Schematic 3
Heat Resistant Refined Metal Armor Schematic 4
Cold Resistant Refined Metal Armor Schematic 1
Cold Resistant Refined Metal Armor Schematic 2
Cold Resistant Refined Metal Armor Schematic 3
Cold Resistant Refined Metal Armor Schematic 4
Heat Resistant Pal Metal Armor Schematic 1
Heat Resistant Pal Metal Armor Schematic 2
Heat Resistant Pal Metal Armor Schematic 3
Heat Resistant Pal Metal Armor Schematic 4
Cold Resistant Pal Metal Armor Schematic 1
Cold Resistant Pal Metal Armor Schematic 2
Cold Resistant Pal Metal Armor Schematic 3
Cold Resistant Pal Metal Armor Schematic 4
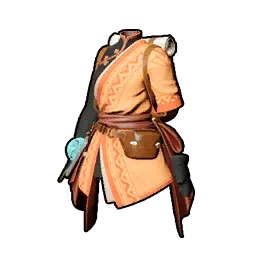
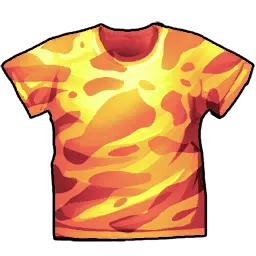
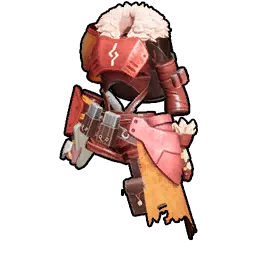
Tropical Outfit
Tropical Outfit +1
Tropical Outfit +2
Tropical Outfit +3
Tropical Outfit +4
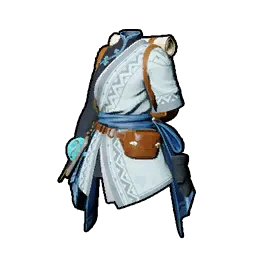
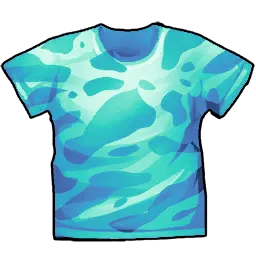
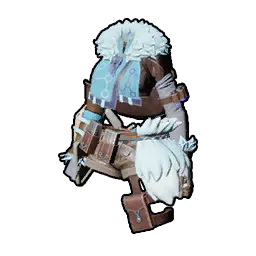
Tundra Outfit
Tundra Outfit +1
Tundra Outfit +2
Tundra Outfit +3
Tundra Outfit +4

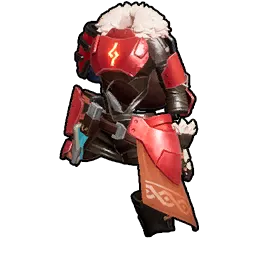
Heat Resistant Pelt Armor
Heat Resistant Pelt Armor +1
Heat Resistant Pelt Armor +2
Heat Resistant Pelt Armor +3
Heat Resistant Pelt Armor +4
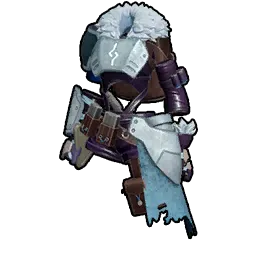
Cold Resistant Pelt Armor
Cold Resistant Pelt Armor +1
Cold Resistant Pelt Armor +2
Cold Resistant Pelt Armor +3
Cold Resistant Pelt Armor +4
Heat Resistant Metal Armor
Heat Resistant Metal Armor +1
Heat Resistant Metal Armor +2
Heat Resistant Metal Armor +3
Heat Resistant Metal Armor +4
Cold Resistant Metal Armor
Cold Resistant Metal Armor +1
Cold Resistant Metal Armor +2
Cold Resistant Metal Armor +3
Cold Resistant Metal Armor +4
Heat Resistant Refined Metal Armor
Heat Resistant Refined Metal Armor +1
Heat Resistant Refined Metal Armor +2
Heat Resistant Refined Metal Armor +3
Heat Resistant Refined Metal Armor +4

Cold Resistant Refined Metal Armor
Cold Resistant Refined Metal Armor +1
Cold Resistant Refined Metal Armor +2
Cold Resistant Refined Metal Armor +3
Cold Resistant Refined Metal Armor +4
Heat Resistant Pal Metal Armor
Heat Resistant Pal Metal Armor +1
Heat Resistant Pal Metal Armor +2
Heat Resistant Pal Metal Armor +3
Heat Resistant Pal Metal Armor +4
Cold Resistant Pal Metal Armor
Cold Resistant Pal Metal Armor +1
Cold Resistant Pal Metal Armor +2
Cold Resistant Pal Metal Armor +3
Cold Resistant Pal Metal Armor +4

Chikipi Poultry

Lamball Mutton

Raw Kelpsea

Galeclaw Poultry

Rushoar Pork

Raw Dumud

Eikthyrdeer Venison

Reindrix Venison

Caprity Meat
Mozzarina Meat

Broncherry Meat

Mammorest Meat
Grilled Chikipi
Lamball Kebab
Grilled Kelpsea
Grilled Galeclaw

Roast Rushoar
Broiled Dumud
Roast Eikthyrdeer

Roast Reindrix
Herb Roasted Caprity

Mozzarina Steak

Broncherry Rib Roast

Mammorest Steak
Chikipi Sauté
Herb Roasted Lamball
Grilled Lamball

Stewed Galeclaw

Rushoar Bacon 'n' Eggs

Reindrix Stew

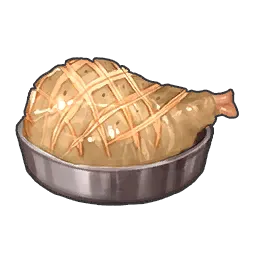
Fried Chikipi

Rushoar Hot Dog

Eikthyrdeer Loco Moco

Eikthyrdeer Stew

Mozzarina Hamburger
Mozzarina Cheeseburger

Fried Kelpsea

Dumud Chowder
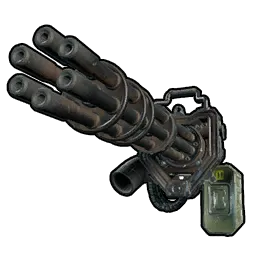
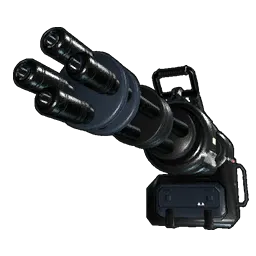
Gatling Gun

Lyleen Floral Cap

Sibelyx Hat

Leezpunk Hood

Killamari Cap

Cawgnito Hat

Ribbuny Headband

Lamball Helm

Dumud Helm

Swee Cap

Dazzi Hat

Cattiva Hat

Summoning Altar
Bellanoir's Slab

Bellanoir Libero's Slab

Bellanoir's Slab Fragment

Bellanoir Libero's Slab Fragment

Ancient Civilization Core

Ring of Mercy

Low Quality Recovery Meds
Recovery Meds

High Quality Recovery Meds

Cavern Mushroom
Ability Glasses

Vital Remedy
Stamina Remedy
Might Remedy

Speed Remedy

Burden Remedy

Vital Elixir
Stamina Elixir
Might Elixir
Speed Elixir
Burden Elixir

Life Lotus (S)

Stamina Lotus (S)

Power Lotus (S)

Speed Lotus (S)

Carrying Lotus (S)

Ribbuny Ribbon

Swee Hair

Killamari Tentacle

Dazzi Cloud

Leezpunk Crest

Life Lotus (L)
Stamina Lotus (L)

Power Lotus (L)

Speed Lotus (L)

Carrying Lotus (L)
Plasteel Armor

Plasteel Helmet
Training Manual (S)
Training Manual (M)
Training Manual (L)
Training Manual (XL)

Training Crystal
Life Fruit

Power Fruit
Stout Fruit
Grenade Launcher

Guided Missile Launcher
Multi Guided Missile Launcher
Laser Gatling Gun
Hyper Glider +3

Ultra Shield +4

Ultimate Sphere
Frag Grenade Mk2

Homeward Thundercloud
All-Purpose Pal Extract☆1
All-Purpose Pal Extract☆2
All-Purpose Pal Extract☆3
All-Purpose Pal Extract☆4

Concentrated All-Pupose Pal Extract
Multiclimate Undershirt
Multiclimate Undershirt +1
Multiclimate Undershirt +2
Bellanoir Libero (Ultra) Slab

Bellanoir Libero (Ultra) Slab Fragment

Witch's Crown (Ultra)
Blazamut Ryu Saddle
Helzephyr Lux Saddle
Quivern Botan Saddle
Chillet Ignis Saddle
Flamethrower Fuel
Missile Ammo
Grenade Ammo
Blazamut Ryu Slab

Blazamut Ryu Slab Fragment
Blazamut Ryu (Ultra) Slab

Blazamut Ryu (Ultra) Slab Fragment

Ring of Freight
Ring of Freight +1
Ring of Freight +2

Zoe Hat

Axel Hat

Lily Hat

Victor Hat

Marcus Hat
Horns of Supremacy
Heat Resistant Plasteel Armor
Cold Resistant Plasteel Armor
Lightweight Plasteel Armor
-
-
Gatling Gun Bullet
Meteorite Fragment
Dog Coin
Makeshift Handgun +1
Makeshift Handgun +2
Makeshift Handgun +3
Makeshift Handgun +4
Makeshift Handgun Schematic 1
Makeshift Handgun Schematic 2
Makeshift Handgun Schematic 3
Makeshift Handgun Schematic 4

Mysterious Accessory Box
Box of Mystery Accessories
Laser Rifle +1
Laser Rifle +2
Laser Rifle +3
Laser Rifle +4
Laser Rifle Schematic 1
Laser Rifle Schematic 2
Laser Rifle Schematic 3
Laser Rifle Schematic 4
Flamethrower Schematic 1
Flamethrower Schematic 2
Flamethrower Schematic 3
Flamethrower Schematic 4
Grenade Launcher +1
Grenade Launcher +2
Grenade Launcher +3
Grenade Launcher +4
Grenade Launcher Schematic 1
Grenade Launcher Schematic 2
Grenade Launcher Schematic 3
Grenade Launcher Schematic 4
Guided Missile Launcher +1
Guided Missile Launcher +2
Guided Missile Launcher +3
Guided Missile Launcher +4
Missile Launcher Schematic 1
Missile Launcher Schematic 2
Missile Launcher Schematic 3
Missile Launcher Schematic 4
Multi Guided Missile Launcher +1
Multi Guided Missile Launcher +2
Multi Guided Missile Launcher +3
Multi Guided Missile Launcher +4
Quad Missile Launcher Schematic 1
Quad Missile Launcher Schematic 2
Quad Missile Launcher Schematic 3
Quad Missile Launcher Schematic 4
Gatling Gun +1
Gatling Gun +2
Gatling Gun +3
Gatling Gun +4
Gatling Gun Schematic 1
Gatling Gun Schematic 2
Gatling Gun Schematic 3
Gatling Gun Schematic 4

Saya Hat
Skill Fruit: Air Blade
Skill Fruit: Circle Vine
Skill Fruit: Multicutter
Skill Fruit: Splash
Skill Fruit: Wall Splash
Skill Fruit: Flame Wall
Skill Fruit: Volcanic Rain
Skill Fruit: TriSpark
Skill Fruit: Thunder Rain
Skill Fruit: Thunderstorm
Skill Fruit: Rockburst
Skill Fruit: Sand Twister
Skill Fruit: Icicle Line
Skill Fruit: Diamond Rain
Skill Fruit: Dark Cannon
Skill Fruit: Dark Arrow
Skill Fruit: Umbral Surge
Skill Fruit: Apocalypse
Skill Fruit: Beam Slicer
Skill Fruit: Comet
Skill Fruit: Blast Cannon
Plasteel Armor +1
Plasteel Armor +2
Plasteel Armor +3
Plasteel Armor +4
Heat Resistant Plasteel Armor +1
Heat Resistant Plasteel Armor +2
Heat Resistant Plasteel Armor +3
Heat Resistant Plasteel Armor +4
Cold Resistant Plasteel Armor +1
Cold Resistant Plasteel Armor +2
Cold Resistant Plasteel Armor +3
Cold Resistant Plasteel Armor +4
Lightweight Plasteel Armor +1
Lightweight Plasteel Armor +2
Lightweight Plasteel Armor +3
Lightweight Plasteel Armor +4
Plasteel Helmet +1
Plasteel Helmet +2
Plasteel Helmet +3
Plasteel Helmet +4
Plasteel Armor Schematic 1
Plasteel Armor Schematic 2
Plasteel Armor Schematic 3
Plasteel Armor Schematic 4
Heat Resistant Plasteel Armor Schematic 1
Heat Resistant Plasteel Armor Schematic 2
Heat Resistant Plasteel Armor Schematic 3
Heat Resistant Plasteel Armor Schematic 4
Cold Resistant Plasteel Armor Schematic 1
Cold Resistant Plasteel Armor Schematic 2
Cold Resistant Plasteel Armor Schematic 3
Cold Resistant Plasteel Armor Schematic 4
Lightweight Plasteel Armor Schematic 1
Lightweight Plasteel Armor Schematic 2
Lightweight Plasteel Armor Schematic 3
Lightweight Plasteel Armor Schematic 4
Plasteel Helmet Schematic 1
Plasteel Helmet Schematic 2
Plasteel Helmet Schematic 3
Plasteel Helmet Schematic 4
Shroomer Saddle
Shroomer Noct Saddle
Selyne Saddle
Leezpunk Hood Schematic 1
Leezpunk Hood Schematic 2
Leezpunk Hood Schematic 3
Leezpunk Hood Schematic 4
Killamari Cap Schematic 1
Killamari Cap Schematic 2
Killamari Cap Schematic 3
Killamari Cap Schematic 4
Ribbuny Headband Schematic 1
Ribbuny Headband Schematic 2
Ribbuny Headband Schematic 3
Ribbuny Headband Schematic 4
Swee Cap Schematic 1
Swee Cap Schematic 2
Swee Cap Schematic 3
Swee Cap Schematic 4
Dazzi Hat Schematic 1
Dazzi Hat Schematic 2
Dazzi Hat Schematic 3
Dazzi Hat Schematic 4
Leezpunk Hood +1
Leezpunk Hood +2
Leezpunk Hood +3
Leezpunk Hood +4
Killamari Cap +1
Killamari Cap +2
Killamari Cap +3
Killamari Cap +4
Ribbuny Headband +1
Ribbuny Headband +2
Ribbuny Headband +3
Ribbuny Headband +4
Swee Cap +1
Swee Cap +2
Swee Cap +3
Swee Cap +4
Dazzi Hat +1
Dazzi Hat +2
Dazzi Hat +3
Dazzi Hat +4
Quad Missile Launcher Schematic
Lockpicking Tool v1
Xenogard Saddle
Meteor Launcher
Meteorite Bullet

Lockpicking Tool v2
Lockpicking Tool v3

Mysterious Mushroom

Mysterious Mushroom Juice
Skill Fruit: Holy Burst
Skill Fruit: Flame Funnel